登录 Google Developers Console
首先,您需要登录您的 Google 帐户,然后访问 Google Developers Console。
选择一个项目
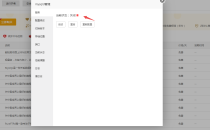
登录并访问 Google Developers Console 后,单击“选择项目”菜单项。
创建项目
单击“选择项目”菜单项后,将出现一个弹出窗口。我们需要点击“新建项目”。
设置项目
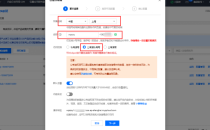
单击“新建项目”后,我们需要为项目选择一个名称。完成设置项目后,单击“创建”。
Create Credentials
To use the Google API we need to Create Credentials. Click on “Credentials” to get started.
After clicking on “Credentials” we will need to create an OAtuh 2.0 client ID. Click on “OAuth consent screen”.
Create an OAuth 2.0 client ID
Step 1: Choose from the following options and then click on “Create”:
- Internal – only available to users within your organization.
- External – available to any user with a Google Account.
Step 2: After clicking on “Create” we will need to set the following options:
Page1: OAuth consent screen
- Application name – The name of the app asking for consent
- User support email – For users to contact you with questions about their consent
- Application logo – Optional
- Application Homepage page – Optional until you deploy your app
- Application Privacy Policy link – Optional until you deploy your app
- Application Terms of Service link – Optional
- Authorized domains – Optional until you deploy your app
- Email address – These email addresses are for Google to notify you about any changes to your project.
Click Save and Continue
- Your non-sensitive scopes- you should add the following 3 scopes
Click Save and Continue
Page 3: Test Users
Click Save and Continue
Click Save and Continue
Step 3: Go to “ Credentials” → “Create credentials” → “OAuth client ID”
Step 4: Choose your Application type.
Step 5: We will need to set the following options:
• Name – add your own name
• Authorized JavaScript – add your website url – Example: http://www.yourdomain.com
• Authorized redirect URLs – add your website url – Example: http://www.yourdomain.com
After you finish click on “Create”.
Client ID Credentials
After clicking on “Create” you will be prompted with your Client ID Credentials. You will need to copy the Client ID and click on “Done”. You will also need to copy the name of your OAuth 2.0 client.
粘贴 Google 客户端 ID
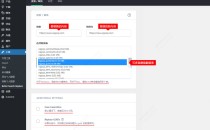
复制 Google 客户端 ID 后,转到您的网站 -> 仪表板 -> 配置文件生成器 -> Social Connect -> 启用 Google 登录并粘贴您的客户端 ID 和 OAuth 2.0 客户端的名称。滚动到底部以保存。
前端的 Google 登录
Social Login with Google应该在WordPress默认和配置文件生成器表单上可用。







还没有评论呢,快来抢沙发~